Easiest Potstickers: Skip the Folds for Quick Homemade Bites
There's nothing quite like the savory, crispy-chewy delight of a perfectly cooked potsticker. That first bite, with its juicy filling and golden-brown crust, transports you straight to your favorite Asian restaurant or a bustling dim sum experience. Yet, for many home cooks, the idea of making these culinary gems from scratch feels daunting, primarily because of the intricate folding often associated with traditional dumplings. What if we told you there's an incredibly simple way to enjoy homemade potstickers without any of the complicated pleats?
This potstickers recipe is a game-changer for anyone craving authentic flavors with minimal fuss. We're ditching the elaborate folds for a method that's so easy, you'll wonder why you ever hesitated. Get ready to add this quick, satisfying dish to your repertoire, perfect for a speedy weeknight meal, an impressive appetizer, or a fun family cooking project.
Embracing the "Lazy Cook's" Secret: Why No Folds Are the New Best Thing
The traditional pleating of potstickers, while beautiful, can be a time-consuming skill to master. For those new to dumpling making, it can even be a source of frustration. But here’s the exciting news: skipping the folds doesn't mean sacrificing authenticity or flavor. In fact, many delicious pan-fried dumplings, known as guotie (which literally translates to "pot stick"), are served in an "open" or simply sealed half-moon style, particularly in street food stalls and casual eateries across Asia.
This "lazy cook's" approach allows you to focus purely on the exquisite flavors of the filling and the perfect crispy-steamed texture, rather than the aesthetics of the crimp. It dramatically cuts down on prep time, making homemade potstickers accessible to everyone, even on a busy weeknight. You'll achieve that irresistible golden crust and tender interior, all while simplifying the assembly process to an absolute minimum. It’s all about getting those delicious bites into your mouth faster!
The Heart of the Matter: Crafting Your Irresistible Potsticker Filling
The magic of any great potsticker lies in its filling. Our version features a classic combination of savory ground pork, earthy mushrooms, and crisp cabbage, all seasoned to perfection. The key here is not just the ingredients, but their preparation – finely mincing everything ensures a cohesive filling that cooks evenly and creates a delightful texture in every bite.
Essential Ingredients:
- Potsticker Wrappers: Look for round dumpling or gyoza wrappers in the refrigerated section of most Asian markets or large grocery stores. While wonton wrappers can be used in a pinch, their texture is thinner and will yield a slightly different result. For optimal results, stick to wrappers specifically designed for dumplings.
- Ground Pork: Opt for a good quality ground pork, ideally with a moderate fat content (around 80/20) for maximum flavor and juiciness.
- Fresh Shiitake Mushrooms: These provide a wonderful umami depth. If fresh aren't available, rehydrated dried shiitakes work well, just be sure to squeeze out excess water.
- Green Cabbage: Finely shredded cabbage adds a delicate crunch and natural sweetness. A mandoline slicer makes quick work of this, ensuring uniform pieces.
- Aromatics: Fresh ginger and garlic are non-negotiable for that signature Asian flavor. Don't skimp!
- Green Onions: Adds a fresh, mild oniony bite.
- Flavor Boosters: Soy sauce, sesame oil, and a touch of cornstarch (as a binder and for moisture retention) are essential. Salt and black pepper to taste.
Mixing the Filling:
In a large bowl, combine the ground pork, finely minced mushrooms, shredded green cabbage, minced ginger, garlic, and sliced green onions. Add the soy sauce, sesame oil, cornstarch, salt, and pepper. Use your hands to thoroughly mix everything together. The goal is for all ingredients to be evenly distributed and for the mixture to feel cohesive. This pork and cabbage potstickers filling is incredibly versatile, so feel free to adjust seasonings to your preference!
Assembling Your Effortless Potstickers: No Folds, No Fuss
This is where our "easiest potstickers" truly shine. Forget YouTube tutorials on complex pleating techniques. We're going for simplicity without compromising on deliciousness.
- Prepare Your Workspace: Lay out a potsticker wrapper on a clean surface. Keep the remaining wrappers covered with a damp paper towel to prevent them from drying out.
- Scoop the Filling: Place about 1.5 to 2 teaspoons of the prepared filling in the center of the wrapper. Don't overfill, or they'll be hard to seal.
- The Simple Seal: Dip a finger in a small bowl of water and lightly moisten the entire edge of the wrapper. Fold the wrapper over into a half-moon shape. Press firmly along the curved edge to seal it completely. You can leave it as a simple half-moon, or for a slightly more defined look, you can press down the top edge to create a flat top, similar to how many guotie are presented. The key is a tight seal to keep the juicy filling contained.
- Repeat: Continue with the remaining wrappers and filling.
The Golden Finish: Cooking Your Potstickers to Perfection
The cooking method for potstickers is a two-step process that yields their characteristic crispy bottom and tender, steamed top. It's crucial for achieving that authentic restaurant-quality texture.
- Sear for Crispness: Heat a tablespoon of vegetable oil in a large non-stick skillet or frying pan over medium-high heat. Once the oil shimmers, carefully place the potstickers in a single layer, ensuring not to overcrowd the pan. Cook for 2-3 minutes, or until the bottoms are beautifully golden brown and crispy.
- Steam for Doneness: Once the bottoms are seared, carefully pour about 1/4 to 1/2 cup of water into the pan. Immediately cover the pan with a tight-fitting lid. The water will instantly turn to steam, cooking the filling through. Quick Tip: When adding water to hot oil, stand back and quickly cover the pan to prevent splattering. Oven mitts are a good idea!
- Finish: Steam for 5-7 minutes, or until the water has mostly evaporated and the potstickers are cooked through. Remove the lid and let any remaining water evaporate, allowing the bottoms to crisp up again slightly if needed.
Serving and Savoring Your Homemade Delights
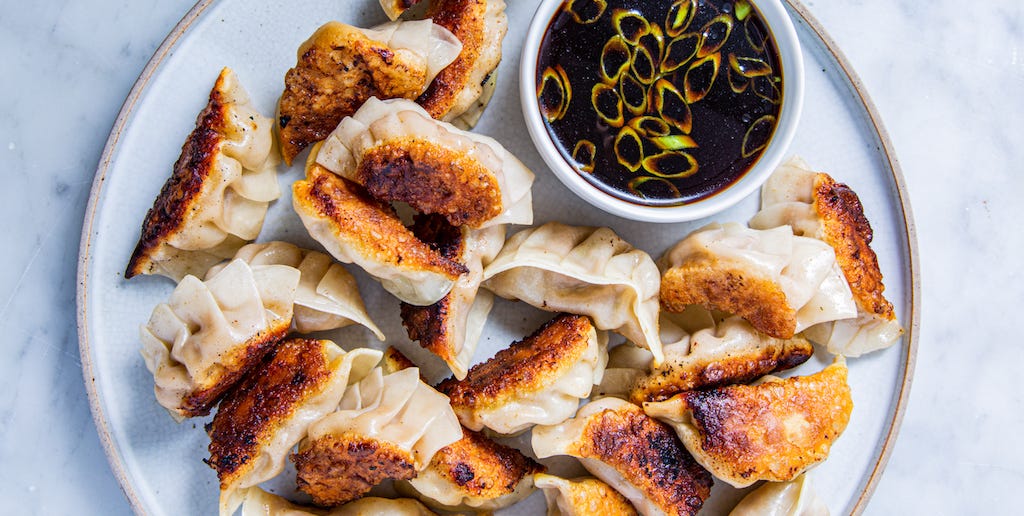
Serve your effortlessly made potstickers immediately with your favorite dipping sauce. A classic sauce often includes soy sauce, rice vinegar, a dash of sesame oil, and a pinch of chili flakes or finely minced ginger and garlic. Experiment with ratios to find your perfect balance!
Potstickers are fantastic on their own as an appetizer or a light meal. For a more elaborate Asian-inspired feast, pair them with dishes like vegetable lo mein, sweet and sour chicken, pan-fried noodles, or a fresh green salad with an Asian dressing.
Pro Tips for Potsticker Perfection (and Variations!)
- Wrapper Wisdom: If using frozen wrappers, ensure they are fully thawed but still slightly chilled. Once opened, keep them covered to prevent drying.
- Storage: Cooked potstickers can be stored in an airtight container in the fridge for up to 3 days. Reheat them in a lightly oiled pan for a fresh crisp, or in the oven to revive their skins. Uncooked potstickers can be frozen on a baking sheet until solid, then transferred to a freezer bag for up to 2-3 months. Cook from frozen, adding a couple of extra minutes to the steaming time.
- Spice it Up: Add a pinch of white pepper or a tiny bit of Chinese five-spice powder to the filling for an extra layer of flavor.
- Veggie Boost: Feel free to add other finely minced vegetables like carrots, water chestnuts, or bamboo shoots for added texture and nutrients.
- Protein Power: While pork is traditional, you can easily substitute ground chicken, turkey, or even a firm plant-based mince for a different twist. Just adjust cooking times if necessary.
Making delicious homemade potstickers doesn't have to be a culinary challenge. By skipping the intricate folds and focusing on quality ingredients and a simple cooking method, you can achieve incredibly satisfying results that rival your favorite takeout. Embrace the ease, savor the flavors, and enjoy the journey of creating these quick homemade bites!
