Unlock the Secret to Perfect Pork & Cabbage Potstickers: Crispy Results Every Time
There’s an undeniable joy that comes from biting into a perfectly cooked potsticker – that initial crisp, golden-brown crust giving way to a tender, savory filling. While these beloved Chinese dumplings might seem like a restaurant-only delicacy, mastering a homemade
potstickers recipe is surprisingly achievable, and arguably, far more rewarding. Forget settling for mediocre takeout; with a little time and the right techniques, you can create a culinary experience that rivals, or even surpasses, your favorite dim sum spot, right in your own kitchen.
Our journey to potsticker perfection focuses on achieving that coveted crispy exterior while ensuring a juicy, flavorful interior. We’ll guide you through crafting a delicious pork and cabbage filling, choosing and handling wrappers, and most importantly, the dual-stage cooking method that guarantees those irresistible golden-brown bottoms. Get ready to impress your family and friends with a feast of homemade delights, perhaps alongside other Asian favorites like vegetable lo mein or homemade egg rolls.
The Heart of the Potsticker: Crafting the Perfect Filling
The foundation of any great potsticker lies in its filling. Our essential
potstickers recipe features a robust blend of ground pork, crisp cabbage, and earthy mushrooms, all brought together with a symphony of Asian aromatics and seasonings.
To create the ideal texture, it's crucial to prepare your ingredients properly. Start with
ground pork, ideally with about 20-30% fat content for juiciness. Next, finely mince your vegetables. For the cabbage, thinly shredding it is key – a mandoline can be a fantastic tool for this, ensuring consistent, hair-thin strips that blend seamlessly into the filling without creating chunky bits. Shiitake mushrooms add a wonderful depth of umami and a pleasant chew; make sure they are also finely minced.
Now for the flavor builders:
- Fresh Ginger: Grated or finely minced, ginger provides a warm, spicy zing.
- Fresh Garlic: Adds a pungent, aromatic foundation.
- Green Onions: Sliced thinly, these offer a mild onion flavor and a touch of freshness.
- Soy Sauce: For umami and saltiness.
- Sesame Oil: Aromatic and nutty, a little goes a long way.
- Cornstarch: This is your secret weapon for a juicy, cohesive filling. It helps bind the ingredients and traps moisture, preventing the filling from drying out during cooking.
- Salt and Black Pepper: Season to taste, enhancing all the other flavors.
Combine all these ingredients in a large bowl and mix thoroughly. The goal is a uniform mixture where all components are evenly distributed. Don't be afraid to get your hands in there to ensure everything is well incorporated. This meticulous preparation ensures every bite of your potsticker bursts with balanced flavor.
Wrapper Wisdom: Choosing & Handling for Success
While the filling provides the flavor, the wrapper delivers the experience. For the best results in your
potstickers recipe, reach for high-quality dumpling or gyoza wrappers. These are specifically designed for potstickers and dumplings, offering the right thickness and pliability to hold the filling, achieve that desirable crisp bottom, and steam up tender. You can typically find them in the refrigerated or freezer section of most Asian markets and many larger grocery stores.
In a pinch, wonton wrappers can be used, but be aware that they are generally thinner and will yield a slightly different texture, often more delicate and prone to tearing. For an authentic potsticker experience, stick to the dedicated dumpling wrappers.
Once you have your wrappers, handling them correctly is crucial. As you work through the assembly line, keep any unused wrappers covered with a
damp paper towel. This simple trick prevents them from drying out, becoming brittle, and cracking when you try to fold them.
Now, for the fun part: filling and folding!
- Lay a wrapper flat on a clean surface.
- Place approximately 2 teaspoons of filling squarely in the center. Avoid overfilling, as this makes sealing difficult and can cause ruptures during cooking.
- Moisten the edge of the wrapper with a little water using your finger or a small brush. This creates a seal when folded.
- Fold the wrapper over the filling to create a half-moon shape, pressing firmly to seal the edges.
- For traditional potstickers, create decorative pleats along the top edge. While beautiful, these can be tricky for beginners. The simplest method is a secure half-moon fold.
If traditional pleating feels daunting, don't despair! There's an equally delicious "lazy cook's" approach that skips complicated folding altogether. For a truly simple and quick alternative, check out our guide on
Easiest Potstickers: Skip the Folds for Quick Homemade Bites. However you fold them, ensure they are sealed well to prevent the filling from escaping.
The Crispy Secret: Mastering the Cook for Golden Potstickers
This is where your homemade potstickers transform from good to absolutely glorious. The secret to those irresistible crispy bottoms, characteristic of the best potstickers, lies in a two-stage cooking method: initial searing followed by steaming.
1.
The Sear (for the Crisp):
* Heat a large non-stick skillet or frying pan over medium-high heat. Add 1-2 tablespoons of vegetable oil (or another neutral oil with a high smoke point) and swirl to coat the bottom.
* Once the oil is shimmering and hot (you can test by flicking a drop of water into the pan – it should sizzle immediately), carefully place your potstickers in a single layer, ensuring they don't touch. Do not overcrowd the pan; cook in batches if necessary.
* Sear the bottoms for 2-4 minutes, or until they achieve a beautiful
golden-brown and crispy crust. Keep an eye on them; the exact time will depend on your stove and pan. This is the crucial step for that signature crunch!
2.
The Steam (for Cooking Through):
* Once the bottoms are perfectly golden, carefully pour about 1/2 cup of water (or enough to cover about 1/4 inch up the sides of the potstickers) into the hot pan.
*
Quick Tip & Safety Note: When water hits hot oil, it will splatter! Stand back, wear oven mitts if preferred, and immediately cover the pan with a tight-fitting lid. This traps the steam, which will cook the pork filling thoroughly and tenderize the wrapper.
* Reduce the heat to medium-low and let the potstickers steam for 8-10 minutes, or until all the water has evaporated and the pork filling is cooked through. The wrappers should appear translucent and plump.
* Remove the lid and, if there's any residual water, allow it to evaporate. You might hear a final sizzle as the bottoms re-crisp slightly.
This dual-method ensures that your potstickers are perfectly cooked inside and out. The initial high heat creates an incredible texture, while the steam gently cooks the interior, making for a truly satisfying bite. For more in-depth techniques on making restaurant-quality dumplings, explore our article:
Master Homemade Potstickers: Better Than Your Favorite Restaurant.
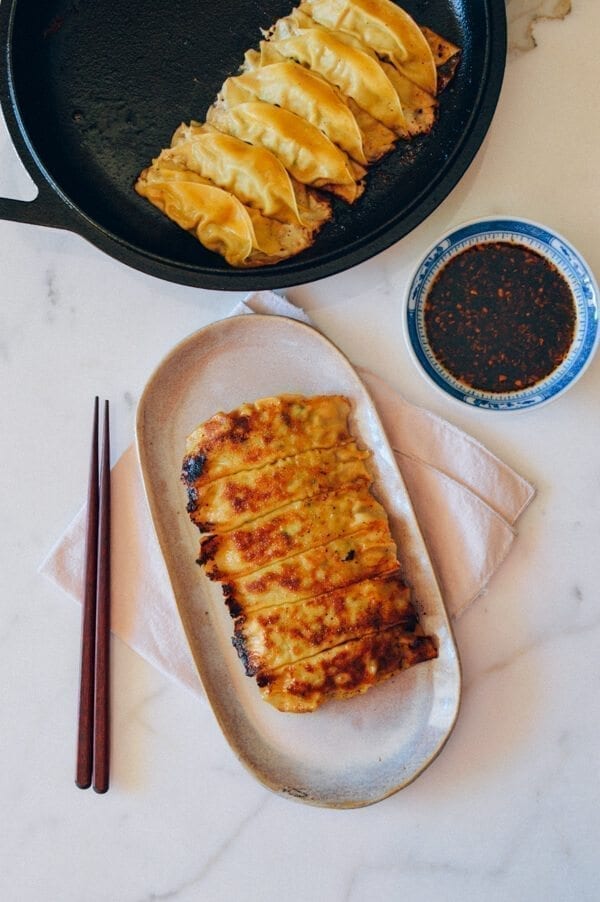
Serving Suggestions & Enjoying Your Culinary Creation
Homemade potstickers are best served immediately, straight from the pan, while they're still hot and crispy. No potsticker experience is complete without a delicious dipping sauce! A classic simple sauce includes soy sauce mixed with a splash of rice vinegar and a dash of sesame oil. Feel free to customize with a pinch of chili flakes, finely minced ginger, or garlic for an extra kick.
Potstickers are incredibly versatile. They can be a fantastic appetizer for a gathering or the star of an Asian-themed dinner. Consider pairing them with:
- Pan-fried noodles or vegetable lo mein
- Sweet and sour chicken or pork
- Steamed greens with an Asian salad dressing
- Homemade egg rolls
This creates a spread that’s perfect for sharing and exploring a variety of flavors and textures.
Storage and Reheating:
If you happen to have any leftovers (a rare occurrence!), cooked potstickers can be stored in an airtight container in the refrigerator for up to 3 days. To reheat and revive their crispiness, avoid the microwave! Instead, arrange them in a single layer on a baking sheet and reheat in a preheated oven at 350°F (175°C) for 10-15 minutes, or until heated through and the skins are crisp again. This method helps restore some of that desirable crunch that makes them so special. You can also re-sear them in a lightly oiled pan for a minute or two on each side.
Conclusion
Embarking on the journey of making your own potstickers is a culinary adventure that promises delicious rewards. From carefully crafting the savory pork and cabbage filling to skillfully sealing each dumpling and, most importantly, mastering the two-stage cooking process for ultimate crispiness, every step contributes to a truly exceptional dish. This comprehensive
potstickers recipe ensures that with a little practice and patience, you'll be creating restaurant-quality potstickers that are not only incredibly flavorful but also boast that coveted golden-brown, crispy bottom. So, gather your ingredients, clear your counter, and prepare to delight in the irresistible taste of homemade perfection!